
The Parker Duofold Junior is a delightful pen to use and is also a joy to work on. I thought it might be useful to show how the pen comes apart for a restoration.

The pen dates from the 1930s, it is a 'Streamline' Duofold, so named because of the slight tapering of the barrel and cap, its predecessor was completely cylindrical. It is a button filler with a 'hanging bar' to compress the ink sac. This is quite an elegant arrangement and is quite handy during dismantling and reassembly as it allows for the section to be a push fit into the barrel rather than threaded.
A little gentle heat around the section, I use a hairdryer, should allow the section to be removed with a firm twist and pulling action. As the pen is around 90 years old it must be treated with due respect, any vicious twisting and forcing could be calamatous. If the section doesn't budge the first time I find that repeating the warming and trying again usually does the trick without resorting to the use of section pliers. If these are needed it is essential to bear in mind that the leverage the pliers suppply greatly magnifies the stress on the materisl, care is needed,
The next step, removing the filler button, is straightforward. Give the button some protection, perhaps a strip of inner tube rubber, grip it firmly with pliers, I prefer needle point jaws on the straight 'barrel' of the button and pull it free. It is 'slotted' with a flared end to keep it in place so enough force is needed to 'click' it out.
After cleaning the old sac from the barrel, alligator forceps and a dental pick are useful here, the pressure bar can be removed.
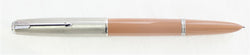
The cap stud screws out to release the clip so the cap can be proprerly cleaned. A little gentle heat may help here.

I generally don't remove the nib from the section unless there is a reason to do so. Allignment of the nib in the section and that of the nib tines can be done visually and water can be run through the channels using a rubber bulb to ensure good flow.
It is best to do all cleaning and any polishing that may be needed at this stage, I'll do a separate blog post on this aspect.
After trimming and fitting the sac reassembly can be completed and the pen is ready for testing, the most exciting part of the whole process.
Dismantling any button filling pen is essentially the same as this, apart from the pressure bar which, in most cases seats into the button itself rather than being suspended from the barrel as it is in this pen.